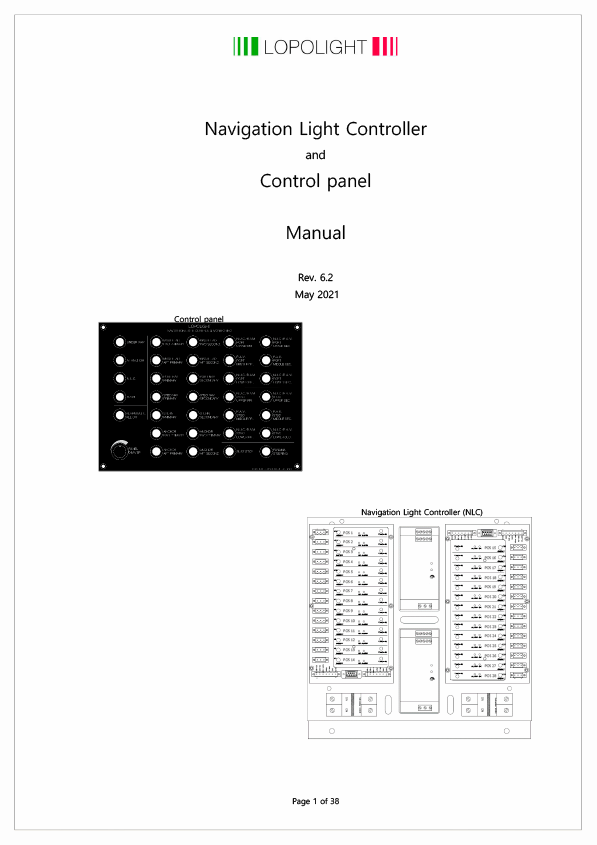
NLC
SERVICE
AREA
Overall
download
list:
GUIDELINE &
DOCUMENTATION
AREA.
NLC Brochure:
Brochure
Declaration:
Approvals
Guidelines decription:
Guideline for configuration
NLC specification form
Smart Controller (option)
System
Detailed pictures:
NLC, closed box
NLC, open box
NLC, detail 1
NLC, detail 2
Panel, front
Panel, detail 1
Panel, detail 2
Panel profile
TECHNICAL
DOCUMENTATION
AREA.
NLC manual/Pushbutton panel
NLC manual/Mimic panel
Drawings:
System Overview
Panel up to 28 lights
Panel up to 21 lights
Panel up to 14 lights
NLC system box
Instructions:
Mounting of NLC in enclosure
Change of power supplies
Communication Protocols:
NMEA interface protocol
INSTALLATION &
CONTROLLERS
AREA.
INSTALLATION & RECOMMENDATIONS:
General electrical Installation Guide
Cable Dimensioning Chart
Data communication protocol for NLC (NMEA 0183)
Dimmer for deck/interior lights P/N 400-126
Certificates:
MED
(B+D) DECLARATION
OF CONFORMITY:
CURRENT VERSION: S/N 60238500
2019 from S/N 60212200 to S/N 60228499
2019 from S/N 60203150 to S/N 60212199
2018 from S/N 60132654 to S/N 60203149
2018 from S/N 60132166 to S/N 60132653
2018 from S/N 60129570 to S/N 60132165
2017 from S/N 60123661 to S/N 60129569
2017 from S/N 60121320 to S/N 60123660
2017 from S/N 60109208 to S/N 60121319
2016 from S/N 60105900 to S/N 60109207
2015 from S/N 60088502 to S/N 60105899
2014 from S/N 60078394 to S/N 60088501
2013 from S/N 60069137 to S/N 60078393
2013 from S/N 60063943 to S/N 60069136
2012 from S/N 60058628 to S/N 60063942
Replace a Lopolight light in system with Lopolight NLC:
This is the basic steps for install/replace lopolight navigation lights.
1. WITH NLC
Turn OFF the NLC power, both Primary and Secondary
2. REMOVAL OF LIGHT
Take your Nav. light and remove the screw (use a HEX 3 mm key or TORX 15’). Download and follow the Installation guide manual. www.lopolight.com/support/down-load-area
3. REPLACE NAV. LIGHT
Twist the top (light) from the base. Replace and connect the new light.
4. POINTING DIRECTION
Make sure that you set the light pointing in the right direction - arrow pointing toward the bow along the centerline
5. TURN ON POWER
Turn ON NLC power, both Primary and SecondaryThe Nav. light is now been detected, the alarm will sound, and the LMR/Q LED turns red. Push the Manual ON/OFF button. Wait 35 seconds - the LMR/Q is now ready to teach-in.
6. MAKE THE TEACH-IN
Activate the teach-in switch (Insert a 2mm plastic pin or another non-conductive item and pry carefully to activate the switch. During teach-in, the LED on the front of the LMR/Q will flash orange. (When teach-in is complete, the alarm will turn off and the OK LED(Green) indicators appear)
7. LMR/Q CART
LMR/Q short description
8. READY TO GO
The navigation light is now active and ready to go. The control panels still have the same setup as before.
9. MOVE ON TO NEXT LMR/Q
Please let the process end before moving to the next LMR/Q. If activating the teach-in button proves troublesome, it may help if the LMR/Q cover is removed to ease the access to the teach-in button.
Support
videos:
WHAT KIND OF VESSEL POWER
A no-nonsense support program to maximize operational readiness of your navigation light system Lopolight will ensure that all relevant spare parts including instructions for service is on board your vessel and a direct hotline access is available 24/7.
CLASS APPROVED POWER SUPPLY
For classed vessels we offer class approved power supplies from Phoenix®, with options of AC or DC. Extra large power supplies available for Ice Class installations..
Part numbers:
500-200-1AC
500-202-2AC
500-203-1AC/1DC
500-204-2DC
500-205-2AC Ice class
Alternatively we have a more compact option of high quality DC/DC power supply from Victron®
Part numbers:
500-210-1DC
500-211-2DC
500-212-2DC Ice class
500-213-No power supply
INSTALATION CABLE GUIDE
CABLE INFORMATION
We get demands for situations and challenges that can and will..... One of the new things we are working on, a battery lighting power unit, which is a mobile battery supply case for barges. We will present and tell more about it at the stand.
We are looking forward to introduce a final product version shortly.
INTERFACE
When working in sub-zero temperature it is essential to have equipment that you can trust and rely on. The Lopolight ice-class lights are fully automatic, and monitored all the way. The de-icing functions are integrated in the design giving a number of be
NLC OPTIONS OF
SOLUTIONS
FULL SIZE NLC
Required for the Phoenix® power supplies. Each full size system holds up to 28 relays, several systems can be combined up to 60 outputs
COMPACT NLC
Ideal for installations where space is at a premium and power supply is DC. Each compact system holds up to 14 relays, several systems can be combined up to 60 outputs


